 We’re finally at the last post of this series! Patiently we’ve written all our tests and done all our code that implements the required functionality and made sure that our code passes all the tests. But in the end of the day, despite all the theory and coding we want our code to run on a real physical device. Now it’s time for the favorite part of every PLC programmer, which is getting down to the hardware and micro controllers! Let’s get to the grand finale, and test our code on a real PLC, IO-Link master and IO-Link slave.
Test equipment
For the PLC I use my trusty friend, a Beckhoff CX5140 running Win10 IoT Enterprise LTSB x64. This runs the latest version of the TwinCAT runtime, 3.1.4022.4. This will run our software and this will be the device used as an EtherCAT master transmitting and collecting the EtherCAT frames to/from our IO-Link masters.
For IO-Link masters I’m lucky to have some good friends that were nice enough to lend me some equipment, more specifically the following IO-Link masters:
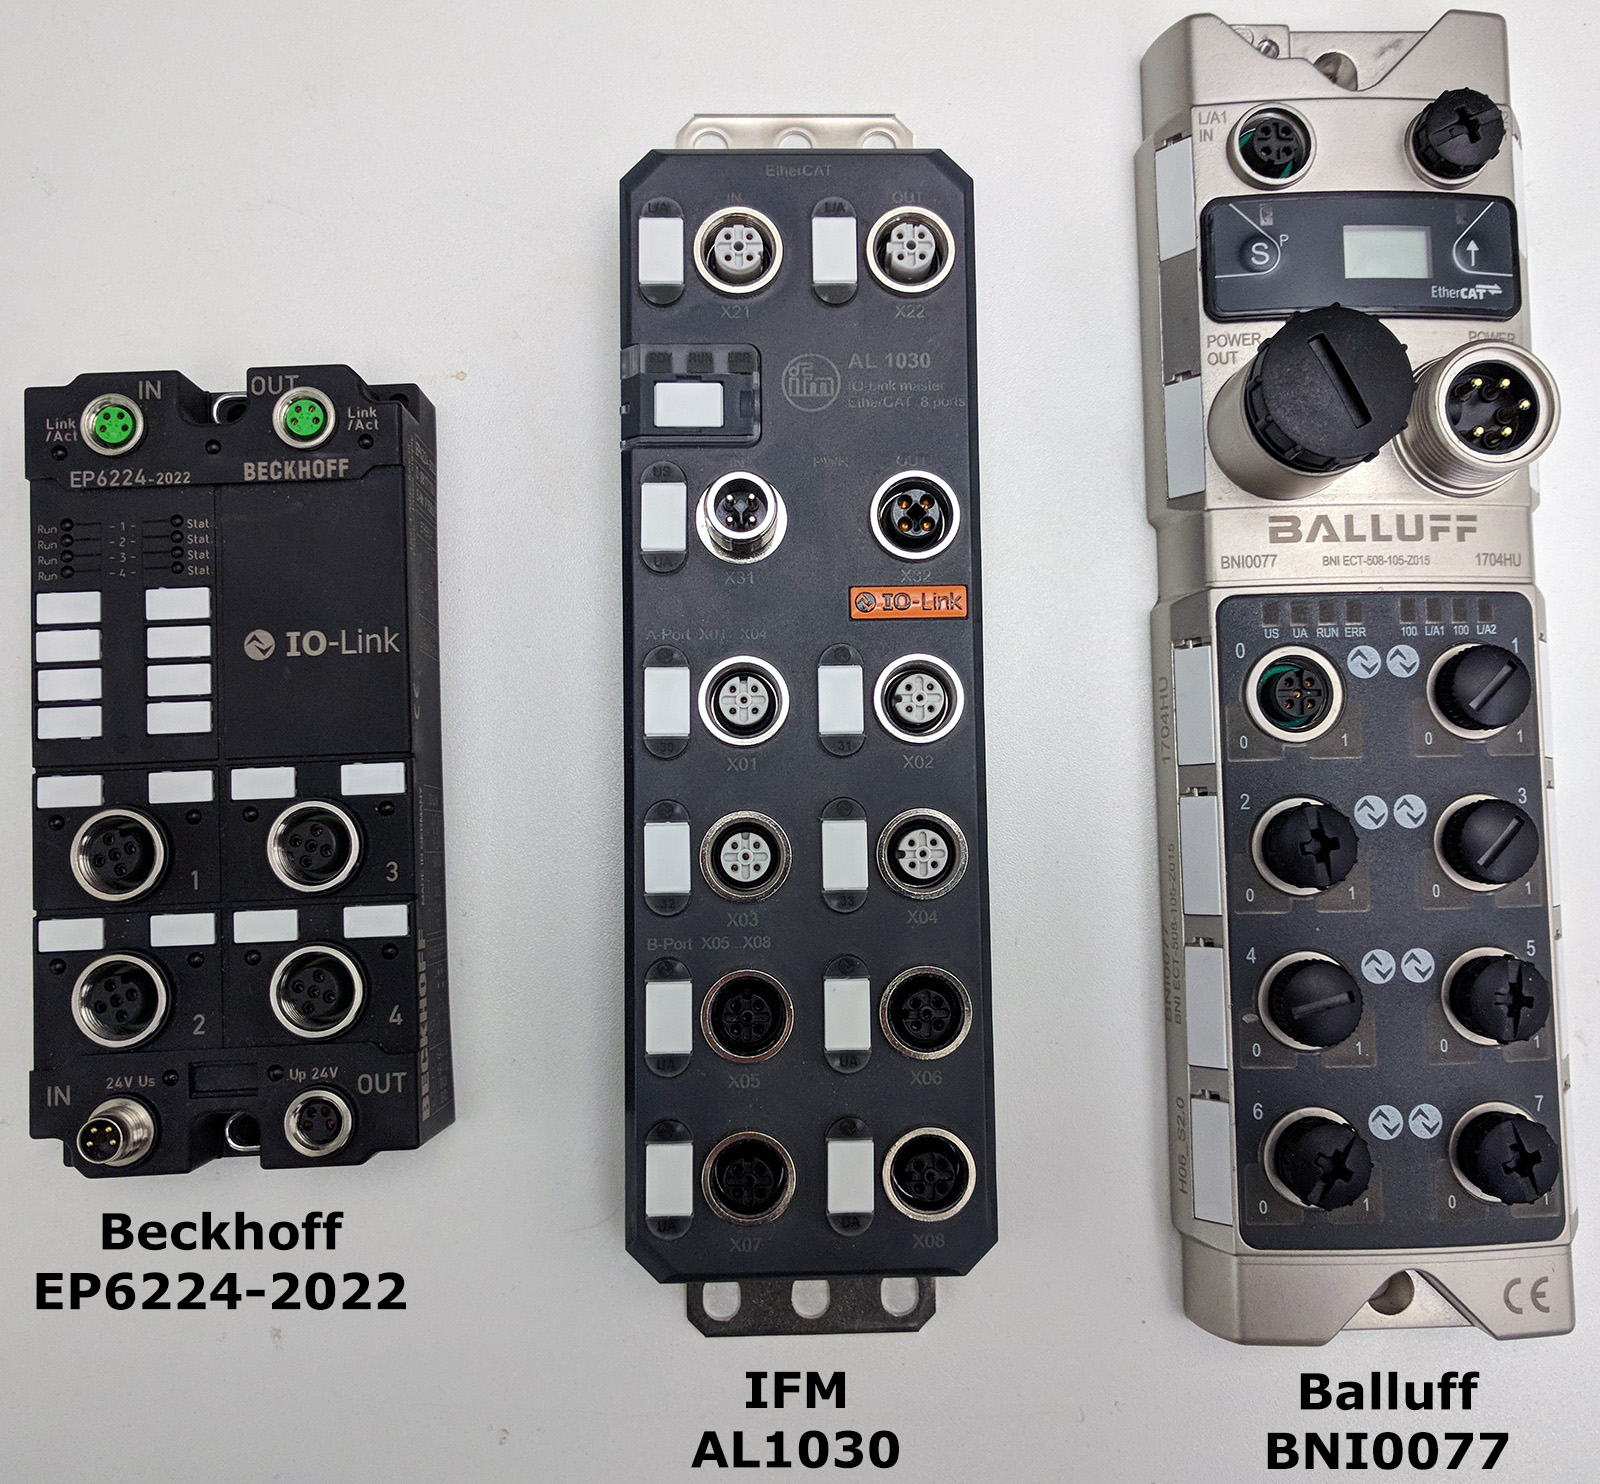
IO-Link masters with EtherCAT
These devices all have an Ingress Protection rating of IP67. Mechanically and electrically there are quite some significant differences between these. Some are rated for higher power on the outputs (if used as such), and the weight/sturdiness difference is also significant. You can probably by looking at them guess which one is the sturdiest. If I threw the Balluff IO-Link master at a person I would probably kill that poor guy/girl, it’s massive and the quality is insanely high. This is probably the device I would use if I were to work on something like a manned mission to Mars. It’s probably a no-brainer that the power performance and sturdiness comes at a premium. But that’s not what I want to talk about. What matters for our purpose is that all three of these support IO-Link events by implementing the diagnosis history object (CoE index 0x10F3) in their CoE directory, which I mentioned how it works briefly in part 2 of this series. I should however mention that there is a slight variation in the amount of diagnosis history objects these devices can hold in their onboard memory. While both the IFM and Balluff one have place for 64 objects, the Beckhoff one only has internal memory for 16 objects. But because the diagnosis history messages are (per default) stored in a ring-buffer of the device itself, 16 should be more than enough for most scenarios.
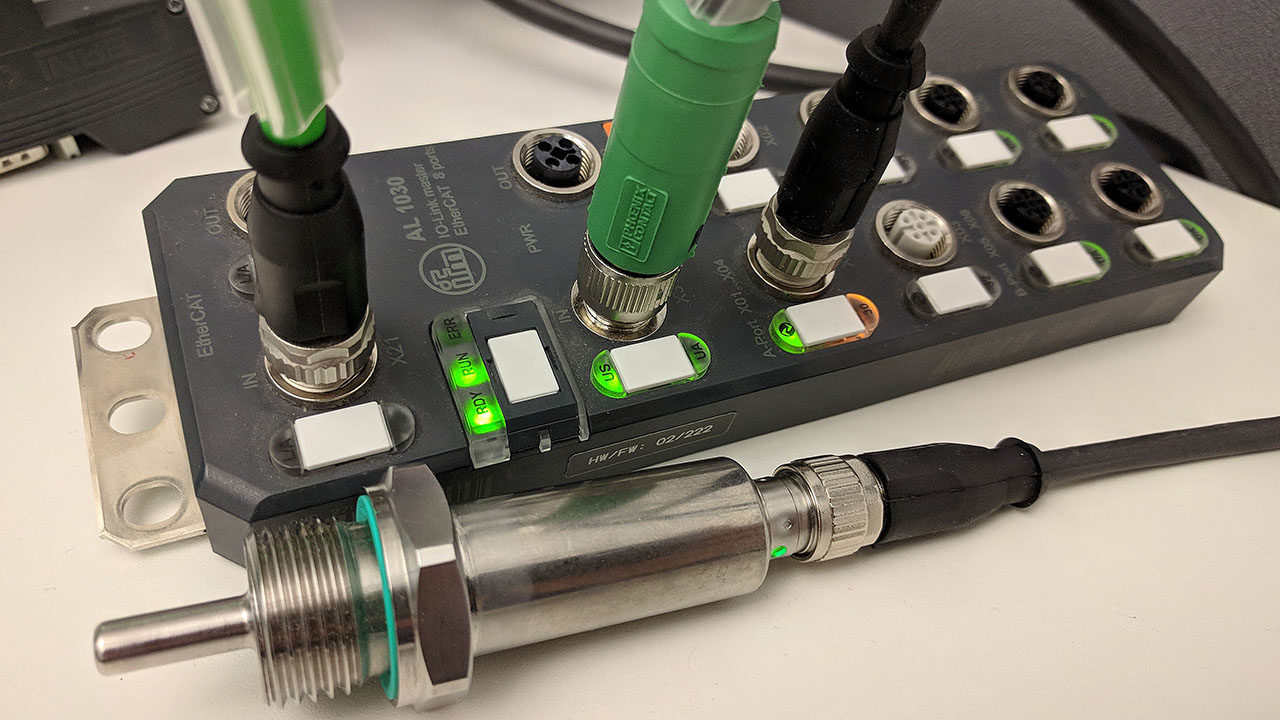
For the IO-Link slave/device itself I’m going to use a IFM 2405 temperature transmitter. It’s using IO-Link as communication protocol with a speed of 38,4 kBaud, sends the temperature as process data, supports IO-Link parameters and most importantly it can output IO-Link events which is what we want to test.
The scenario
But how can we make the device transmit an IO-Link event? Looking at the documentation for the IFM2405 and more specifically the parameter table, we find a parameter that we can use to our advantage. The parameter “Standard command” which resides in index 2 of the parameter dictionary, we see that by writing the value 240 (dec) into this index, the device will create an IO-Link event (called event 8DFE). This is most likely put there by the device manufacturer for testing purposes, and thus we can use it to our advantage and to test that we correctly parse the IO-Link event. To do the actual parameter-write to the device in TwinCAT this is done differently depending on which device we’re using. With Beckhoff EP6224 and IFM AL1030 this is accomplished by enabling ADS over EtherCAT (AoE) in the device, and then by sending an ADS-message to the device (with specific parameters), one can target a specific device on the IO-Link master. On the Balluff BNI0077, this is instead accomplished by using a few specific indexes in the CoE dictionary, and we can thus accomplish this by using the “CoE online”-tab functionality in TwinCAT or in code by using FB_EcCoeSdoWrite.
We’ll also need to write some code to read the diagnosis message itself. As all the diagnosis messages are available in the IO-Link master CoE dictionary, this can be accomplished by using any of the function blocks FB_EcCoeSdoRead or FB_EcCoeSdoReadEx. Once we manage to read the diagnosis messages, we need to have a “cheat sheet”, something to compare our results with. Luckily for us, TwinCAT provides a tab under all EtherCAT slaves that implement the CoE diagnosis history object. As long as the device/slave manufacturer has specified in the EtherCAT slave information (ESI) file that it supports the CoE diagnosis history object, the following tab will be available in TwinCAT:
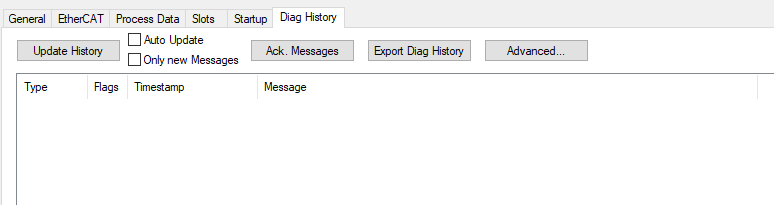
Diagnosis history tab in TwinCAT
I enabled the distributed clock (DC) in the system and started the program. With the IFM temperature sensor connected to the Balluff IO-Link master, and forcing the IFM sensor to send an IO-Link event, this is what shows up on the diagnosis history tab:

Diagnosis message on Balluff IO-Link master
Oh no… it’s in German. My German is really bad… “Ich liebe dich”, that’s as far as my knowledge in the language goes. But we’ll manage! That timestamp surely looks strange. For some reason the Balluff IO-Link master doesn’t care about the DC time. I tried to run without DC and got the same result. Let’s compare this to our ST_DIAGNOSTICMESSAGE-structure where we store the parsed data.

Parsed diagnosis message from Balluff IO-Link master
This seems correct. The “diagnosis type” is a warning message. The timestamp is global, which you can expect from a DC-enabled source. The number of parameters is three, which most likely are the three parameters which are shown above as “Port, EventCode, Qualifier”. The “text identity reference to ESI-file” is 9 (dec), which equals the (0x0009) in the diag history tab message. And the timestamp is 2000-01-01:00, which is what you would expect if for a DC-clock where all data in the 8 bytes for the DC-clock are all zero. Now, let’s try the exact same thing with the IFM AL1030 IO-Link master. Forcing the sensor to create an IO-Link event results in:

Diagnosis message on IFM IO-Link master
With this one it looks a little different. There is a timestamp and the event code is different. 36350 (dec) in hexadecimal is 0x8DFE, which is exactly what we’re supposed to get based on the documentation of the IFM temperature sensor!
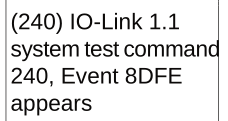
IFM temperature sensor event
And lets now compare this to our ST_DIAGNOSTICMESSAGE-structure where we store the parsed data.
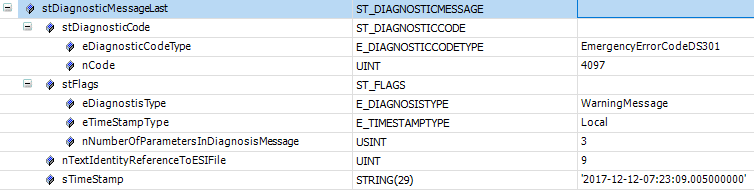
Parsed diagnosis message from IFM IO-Link master
Looks correct! The difference is that the time stamp type is “Local” now instead of “Global”, despite me having DC enabled. The timestamp is slightly delayed (well actually, one hour and 0.5 second, but the hour difference is probably because TwinCAT for display takes the timezone into consideration which is +1 UTC for Sweden). The reason there is a 0.5 second difference is because we were using the PLCs DC task time if the timestamp was local. This DC-time is not used until we’ve received the whole diagnosis message. It simply seems neither the Balluff or IFM IO-Link master are stamping the diagnosis messages with the DC-clock even if DC is enabled!
Now, as a little bonus I wrote some tests cases and code (in that order!) to handle the three parameters (which are stored in the 12 optional bytes, as described in part 2 of this series). Connecting the sensor to the Balluff IO-Link master and comparing the parsed parameters from my software with what TwinCAT shows gives us:

Diagnosis event parameters
I’ve marked the applicable data in red. Everything is a perfect match except the event code, which looks really strange in the “Diag history”-tab. But then we do know for a fact that 36350 (base 10) is the correct code, because that is equivalent to 0x8DFE (hex) which is what the sensor is supposed to send according to its documentation! The reason TwinCAT displays “4294938110” is most likely because of a bug in TwinCAT.
I’d say our code does exactly what it’s supposed to with the real hardware!
Final words
As this is the final part in this series, I’d like to chime in with some final words on the topic of TDD. As with everything else in life, it’s healthy to be critical and ask the basic questions “Will this make my code better?”. TDD isn’t the holy grail of software development. Your code won’t be any better if your test cases are badly written. In the majority of cases where I’ve found bugs in my software it has been because I’ve failed to write good unit tests. Through the years I’ve learned to be humble against the challenge to have good test cases, because that really is where the challenge is at! Also, unit testing by definition only tests the functionality of the units (function blocks) themselves. They will not test integration and system-level functionality. If you for instance want to do performance testing, you most likely want to utilize other techniques and use other frameworks/testing tools. Unit testing should and must be done in parallel with other software testing activities.
TDD has helped me in such a way that I’ve shifted my mindset of how I write code. As long as I’m spending enough time thinking the test cases through, the software bugs stay away. I mostly feel the challenge isn’t in making sure the code passes the tests but instead in making sure that the tests cases are good enough. But all the time spent on doing that pays back. And when the software that you’re writing is going to control a machine worth hundred of thousands or even millions of €$£, it gives a better night of sleep knowing that the software has all these tests backing it up. In the end, it’s not just about to get it to work. We should aim higher, we should write high quality software that we as software engineers can be proud of. TDD pushes in that direction.
Next thing I want to mention is the importance of having access to an unit testing framework. In this series we created the tests in the simplest possible way, by returning a Boolean of whether the test was successful or not. We might for example want to extend this functionality with:
- Logging functionality – Write a string with an explanation of what failed/succeeded
- Standard assert functions for all primitive types
- Time limiting – Set a maximum time for how long a test can run before we consider it failed
By using a common framework in your projects you’ll also have a common way to see the results and to write your test cases. Unfortunately for TwinCAT developers, there is no (open or closed source) unit testing framework available. If I get the time to wrap certain things around, I will publish the one that I’ve developed and which I’m using for my projects as open source. (update 2020-01-09: I’ve released an unit testing framework for TwinCAT, click here).
And just one final thing that I want to mention. I know that although I’ve tried to answer a few questions about what TDD is and how it can be used, I’ve probably raised more questions than I’ve answered. One important topic to talk about has to do with complexity. The example that I’ve used in this series was simple, and simple it was for a good reason. I didn’t want to spend hour after hour with a complex example, as my main goal was to show the concepts of TDD. Your software is usually much more complex than just simply parsing data. Usually you have many dependencies to other function blocks that are outside of your control (say for instance, doing an CoE SDO read). Let’s just take an example. What if your software has parts where an SDO-read (with a function block provided by Beckhoff) is done, how do I test that? Doing that involves making several steps, but one step that is key is making sure that all your dependent objects are resolved using interfaces, and then injecting the dependencies into your function block (this is called dependency injection, a common technique used in object-oriented programming). By doing this dependency injection of any external function blocks and creating an interface for them, you can mock the dependent objects for the tests! Simply stated, there is a lot more I would want to talk about regarding test driven development, but this simply will have to wait for future posts about the subject. With these series of posts I hope I have inspired you to take the first step.
I’ve only been able to scrape on the surface of test driven development, which means I most likely will post more content on this topic in the future. Thanks for following this series. Do you disagree with something? Something that’s missing in this series? Something that you found particularly good or that you want me to write more about? I’d be very happy for any feedback!
Hello Jakob, thankyou for taking the time to pass on your knowledge. This is a well laid-out and explained series. It has been a good starter for using TDD in the IEC61131-3 world. I’ll be using it in my project.
Hello Jakob, I start testing the TcUnit frame work and have a question about debugging. The tests now run at the activation of the TwinCAT project. In that state it is not possible to be online and debug the code.
Is is possible to rerun the test after the project is activated and PLC is online? It would be helpful if I can set a breakpoint to debug the tested function with test data.