
In the previous post we were introduced to the concept of continous integration and
continous delivery (CI/CD) in the world of PLC software development, more specifically TwinCAT development. The conclusion is that certain processes in the process of creating software can and should be automated. As an example, we set the goal of automating static code analysis of all TwinCAT software. In this part of the series of CI/CD we will look into some practical matters of installing and configuring the necessary software.
I’ll go back to a picture that I showed in the last post, that shows what this post will mostly be about.
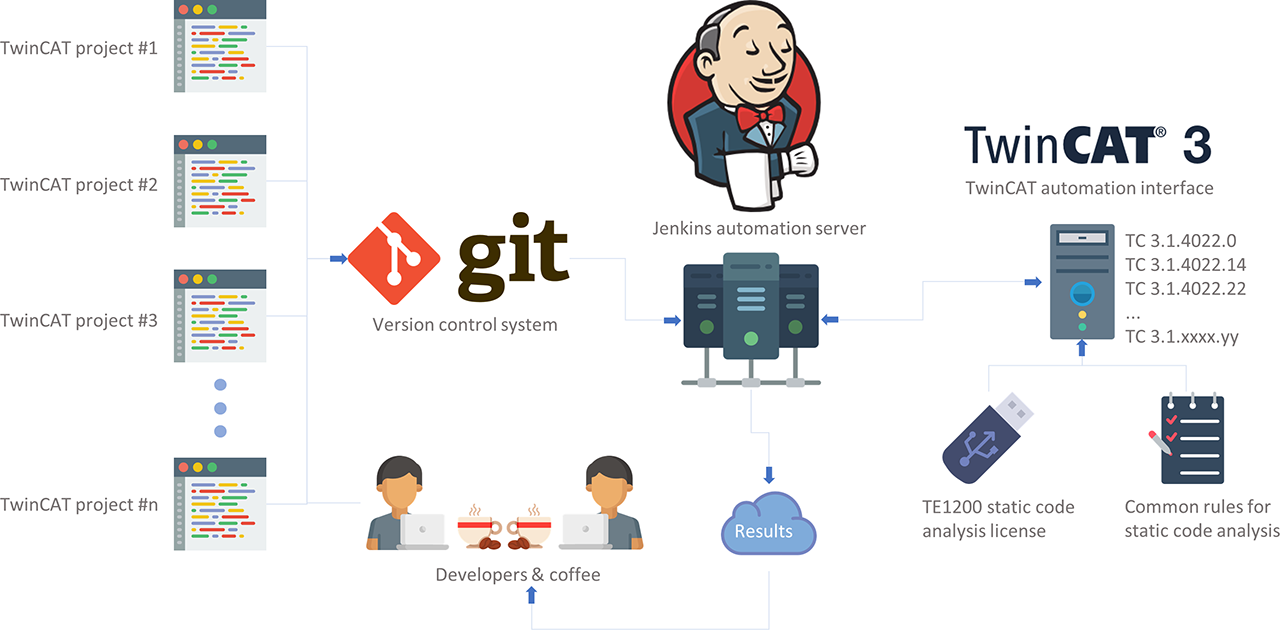
Our goal and ambition is that once a developer has commited some code to GIT, it will be automatically checked using the rules defined by the static code analysis tool. Once the code is commited, all the checks should be done automatically without any operator intervention.
Thus the artefacts that we need here are:
- The developers (+ coffee to keep them doing their job)
- TwinCAT projects (created by the above guys/girls)
- Version control system – GIT in this case (can be most other version control system)
- Automation server – Jenkins in this case
- Build server – Windows machine with Visual Studio & TwinCAT
- TE1200 license stick (optional, we can do some basic static code analysis without this license)
- Static code analysis rules that are common for all projects
- Additional automation software that we need to write ourself
All the TwinCAT projects need to be created using TwinCAT 3.1.4022.0 or later, as this is the first version that supports static code analysis using the Beckhoff tool TE1200. Jenkins can be installed on most operating systems. For this scenario I see two alternatives of how we can setup our automated build environment. In alternative #1, we utilize a main Jenkins automation server installed on a Linux distribution, and then have one or more Jenkins slaves with Windows for doing the TwinCAT-related stuff. Even though the actual build needs to be done on a Windows machine (through Visual Studio), there is a possibility in Jenkins called distributed builds. Through a master and slave setting we can for instance install Jenkins on a Linux machine, and then have various slaves for different type of build jobs. We could for instance install the Jenkins master on a CentOS-machine and create one (or several) windows-slaves as Jenkins slaves.
In alternative #2 we have everything in one machine, i.e. the Jenkins automation server and everything TwinCAT-related. This means that everything will be running in Windows.
In a real production environment, you most likely want to use alternative #1 as this scales well. You might already be using Jenkins at your workplace/project. If you want to add functionality to do TwinCAT static code analysis you just need to add an additional Jenkins slave and link that to the Jenkins master. Possibly you’ll even want a different build machine for the different TwinCAT version. However, since Beckhoffs introduction of the remote manager in TwinCAT3 it makes much more sense to only have one build machine for TwinCAT. With the remote manager, it’s possible to have several versions of TwinCAT installed on the same machine. Also, one license of TE1200 is only for one machine so from a license cost perspective it’s also better. I like the TwinCAT remote manager and all the benefits it gives. To get it to work it’s necessary to load the correct version of the TwinCAT XAE prior to loading the TwinCAT project by using the remote manager, which manually can be done in Visual Studio, or by using the TwinCAT automation interface. The drawback of alternative #1 is that it adds some complexity for the configuration of the slaves (which I would however like to point out, is well documented on the Jenkins website and thus not a big issue!). For this post and these series of CI/CD for TwinCAT, I will however go with alternative #2 as it gets us going fast and we can focus on the main points I want to make.
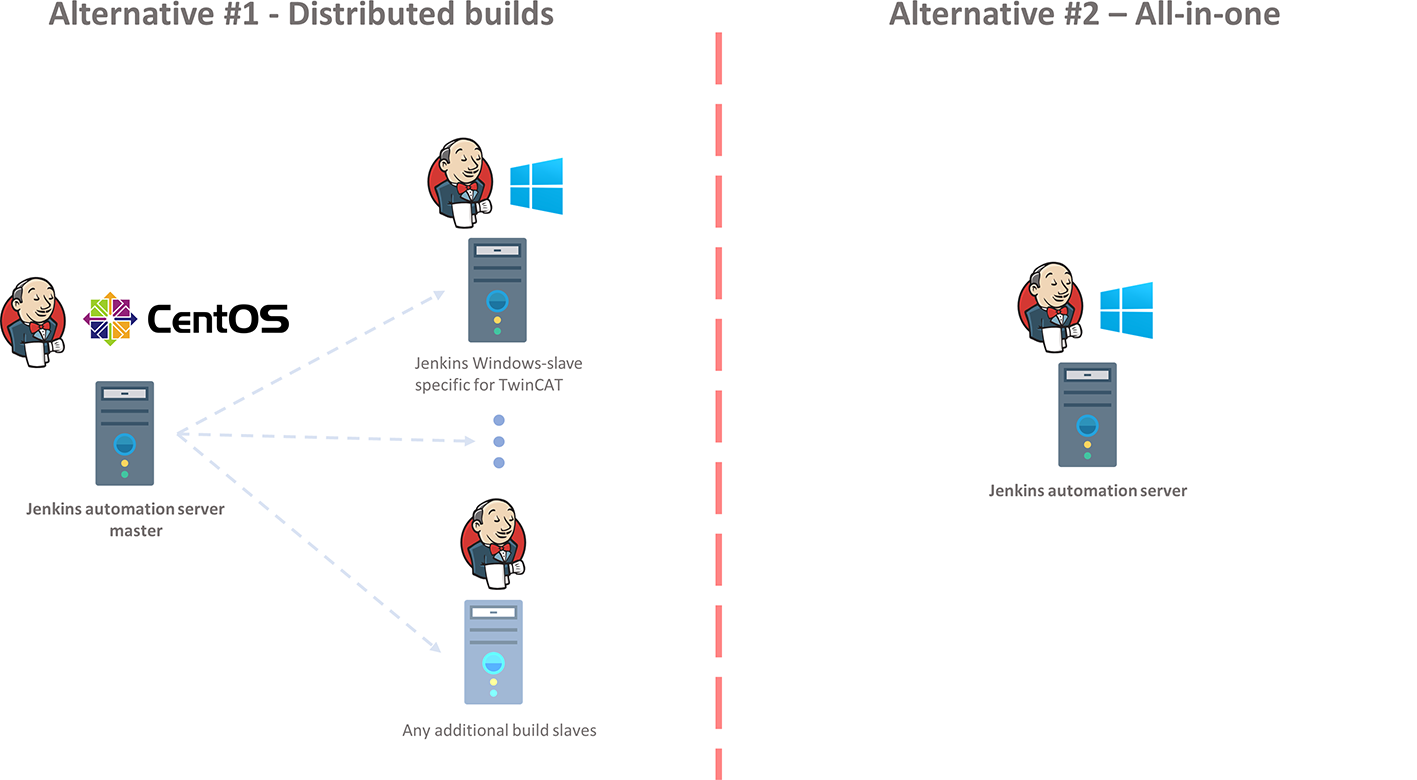
Jenkins install alternatives
In this example we’ll also have our GIT-repositories on this Jenkins-server and expose them to any developers as standard windows shares. In a production environment you most likely want to have the GIT-repositories on a separate real or virtual machine. So this means that we will have:
- Windows 10 Pro
- Visual Studio 2013, 2015 & 2017
- Four versions of TwinCAT 3.1 (4022.0, 4022.4, 4022.16, 4022.22)
- Jenkins automation server
- GIT-repositories
all installed on the same machine.
Now I don’t have too many actual physical machines laying around at home, so I will utilize a virtual machine using VirtualBox. VirtualBox is open-source and free and can be downloaded from www.virtualbox.org. Begin by downloading and installing it. Once VirtualBox is downloaded and installed we need to create a virtual machine. First, download a Windows 10 PRO ISO and install it on this VM. Next bridge your network adapter by setting the NIC to bridged mode.
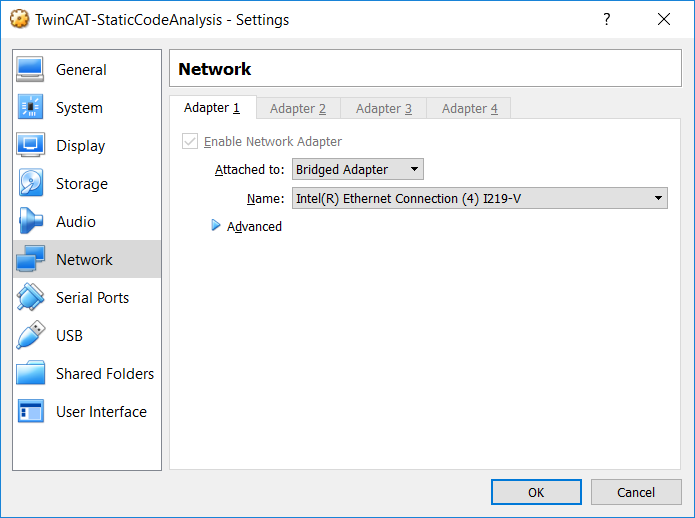
Bridged network adapter in VM
Verify that the VM is on the same subnet as your machine where you will do your TwinCAT development. Your host machine and the VM need to be able to talk to each other. Start the virtual machine, then download GIT from https://git-scm.com/ and install it. For next step, download Jenkins from https://jenkins.io/. Make sure to download the latest Long-term Support (LTS) version for Windows, which at this time of writing is version “2.121.1”. Start the installation and follow the instructions during the installation. At this point you’ve probably noticed that Jenkins is a web server that is running as a service, running (default) on port 8080 on your machine. When it asks you for which plugins should be installed, select Install suggested plugins.
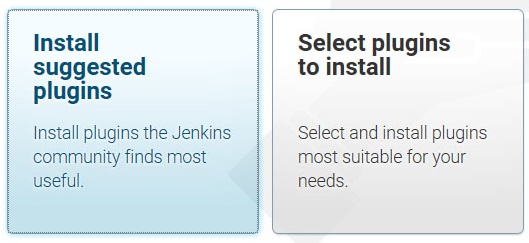
Jenkins plugin selection
This will install a set of default plugins, including a GIT plugin, which we will need to use to have Jenkins detect commits to our repositories.
Next we need to do some configuration work in Jenkins. First we need to set the IP-address of the virtual machine in the Jenkins configuration. Login to Jenkins and click Manage Jenkins, Configure System and change Jenkins URL from http://localhost:8080 to whatever IP-address you have (in my case http://192.168.43.14:8080). Next we need to create something called a job, which is runnable task which is controlled and monitored by Jenkins. As default, Jenkins will download all our projects into C:\Program files (x86)\Jenkins\workspace\<Job name>, the job name being whatever you name it. The problem with this is that we will have some issues with access rights to the programs folder once we’re going to use visual studio in the automated parts of the static code analysis. For this example I’m instead going to put the different jobs in C:\Jenkins\workspace\<job name>. Now normally this setting (called the workspace) should be possible to change from the configuration settings in Jenkins. Unfortunately, this version of Jenkins (2.121.1) has a bug and the setting is not visible. Instead we need to edit the config.xml file located in C:\Program files (x86)\Jenkins. You can’t directly edit this file but need to change the Users permissions according to the screenshot below.
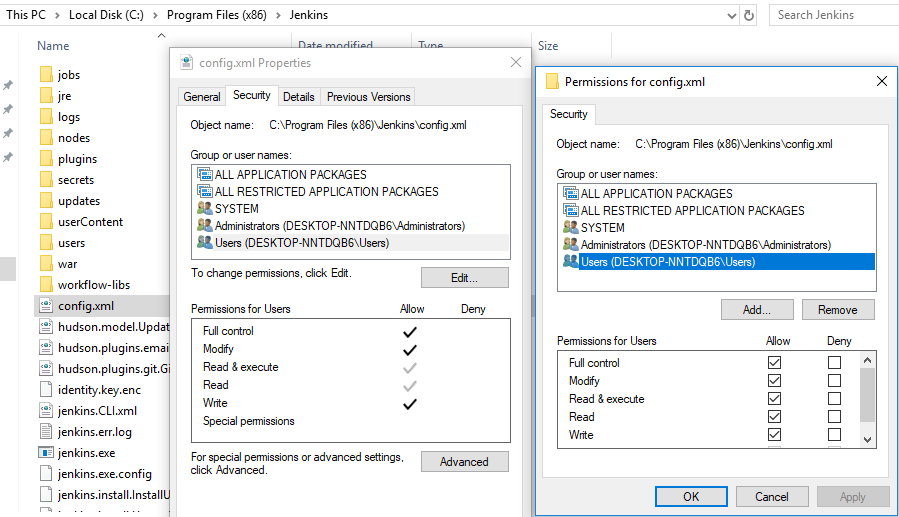
Config.xml permissions
Now edit the file like below:
Workspace settings
Once the file is changed and saved, restore the file permissions. Next step is to create a directory where we will store our GIT repositories. In this example I’ve created the directory C:\GIT_Repos. Next we’ll need to make a windows share out of it. Right click on the folder, select the Sharing-tab, click Share… and select whichever user you want to login as to access the share. Make sure that this user has a password set, as it won’t be possible to access the share if there is no password set to the user. Check if you can access this share by opening file explorer on your host machine and entering \\<ip-address-of-VM>\ and the result in my example was:
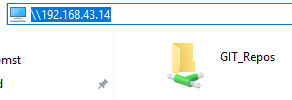
Share of GIT repositories
Next step is to install Visual Studio (VS) in the virtual machine. One of the ambitions of this project is to be able to load and do static code analysis of projects created in different versions of VS, so we’ll install VS2013, VS2015 and VS2017, all of which are available as community editions and free to download from Microsoft.
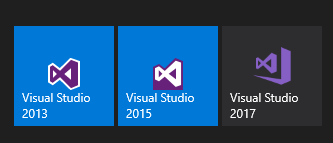
Many versions of VS installed in Windows 10
Next we’re going install the different versions of TwinCAT. From the Beckhoff website it’s only possible to download the latest XAE-version for 4022 (at this point 4022.22). Now, if we want to be able to do static code analysis of projects created in 4022.0, 4022.4, 4022.16 and 4022.22 we need those versions installed as well. The good thing is that we don’t need to install the full XAEs for those versions, but can install what is called the “Remote engineering manager”-versions instead. This is a really neat thing that Beckhoff introduced in TwinCAT 3.1.4020.0, and what it basically does is that it installs all the libraries (+compilers) for that particular version, but does for example not include Visual Studio (which we’ve anyway already installed) nor the scope view. The Beckhoff documentation for the “Remote engineering manager”-downloads says these downloads are available so that developer machine can connect to different PLCs having different versions, but we can also use these downloads for our purpose of static code analysis. The best thing with the “Remote engineering manager”-versions compared to the XAE however is that it’s possible to install an older version of it than the latest installed XAE. For example, with XAEs the TwinCAT installer will inhibit you from installing 4022.0 after installing 4020.22. With the “Remote engineering manager”-versions, you can install them in any order you want. The whole concept of remote manager is really great, and before it was introduced you basically needed a separate machine (be it physical or virtual) for every version of TwinCAT that you needed to build/maintain for, which to be honest was kind of tedious. Regardless of which route you go, you need to contact your local Beckhoff support to get any older version than the latest one for the current build (in this case 4022.22). After installing all three versions of TwinCAT in your system you should be able to load all the different TC-versions with any of the three versions of visual studio.

TwinCAT 4022.x
As you can see we can select any version that we want thanks to the remote manager. Better yet, the functionality of the remote manager is also built in to the TwinCAT automation interface and we can thus do the same thing with code. This is great as we can have several projects being developed simultaneously using different versions of TwinCAT, but still being able to do the static code analysis with the same rules. I’ll get back to how we accomplish this in the coming two posts.
Next we need to create a bare GIT repository in the \\GIT_Repos-directory. This will be used as an example of a TwinCAT library project that we will do static code analysis on. I’ll call this TwinCAT-project CodeAnalysisDemoTcLibrary. Create the library with the latest & greatest TwinCAT-version (currently 3.1.4022.22), a visual studio version of your choice (VS2015 in my example). Make sure to use Beckhoffs Empty PLC Project (and not the Standard PLC Project), as these are optimal for libraries. Remove all configurations except SYSTEM, PLC and I/O (such as C++ and MOTION) as those are not necessary in this case. You can also use commit & push the code to the GIT-repository.

Minimal TC library
As you can see the library does not have any function blocks or any other functionality yet, but be patient, we’ll get there.
Next step is to create a job in Jenkins. A job is a task in your automation process that you want to have accomplished. Login to Jenkins by opening a web browser and enter <<ip-address of your virtual-machine>>:8080, in my case 192.168.43.14:8080. Do this and you will be greeted with this:
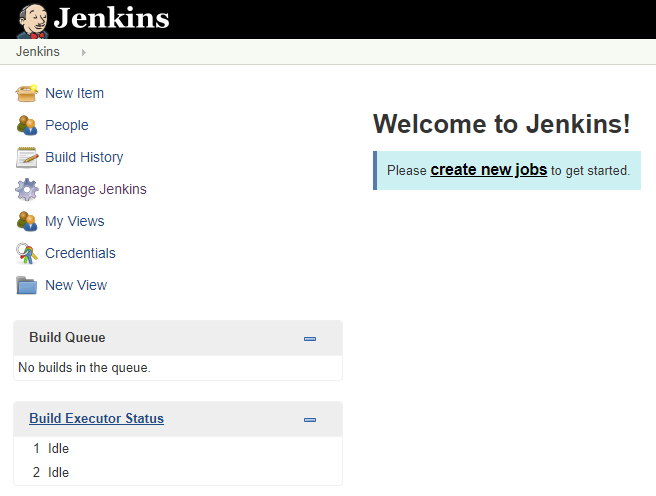
Jenkins intro
Click the create new jobs, name it TwinCATStaticCodeAnalysis, click on Freestyle project and click OK. Select Git as Source Code Management and set the Repository URL to your TwinCAT GIT repository url (in my case C:\GIT_Repos\CodeAnalysisDemoLibrary.git). Under Build Triggers tick the checkbox Poll SCM. Now by using the “poll SCM”-mechanism there are several ways of implementing this, which two of them are:
- By schedule (i.e. check if new code is commited once every minute, or hour, or day…)
- By post-receive hook, i.e. every time code is pushed to the repository the trigger is executed
Number one is easy to implement (you basically just say how often it should check) but has the disadvantage that it consumes resources and adds delay on the execution of our static code analysis. It’s also generally an uglier design choice as the most obvious thing is that we want our scripts to be executed as soon as a change has been done. Therefore, we’ll go for option two which makes sure that the repository does a push-notification. Note that there are many other options other than the two suggested for how this could be done. Hooks in GIT are a wonder in themselves and I strongly encourage you to read about them, as the functionality that they provide will surely spark your imagination of what can be done. I’ll return to this topic in the last post of these series during the final discussions.
The drawback with option two compared to one is that it’s slightly more complicated to implement, but once you’ve done it one or two times, it will stick in your head. Again, make sure that Poll SCM is checked but do not specify a schedule. Save the job. Next go to http://localhost:8080/me/configure, click Show API token… and copy the API Token into notepad as we are going to use this two value soon. Go back to the configuration of the job, and check the checkbox Trigger builds remotely (e.g., from scripts). Paste the API token into Authentication Token.
Go to the location of the CodeAnalysisDemoLibrary git-repository, inside the hooks-folder and create a file called post-receive (just post-receive, no file extension).

Post-receive hook-file
Open the file, and enter the following:
#!C:/Program\ Files/Git/usr/bin/sh.exe
echo "Post-receive started..."

curl.exe --user yourUserNameToJenkins:yourPasswordToJenkins \
--url "http://192.168.43.14:8080/job/TwinCATStaticCodeAnalysis/build?token=ebcc61cb8315414c5287b20b3f047190"

echo "Post-receive ended..."
Replace the username, password, IP-address, jobname and token to your selection. An alternative to specifying your username and password is to allow Jenkins anonymous users to run builds, and you would therefore not have to save the username and password in the post-receive-file. Don’t worry about that this is a bash-script, it will run just fine on Windows using the git shell. Note that I added some terminal outputs (echo “…”), so that we can see when the action comes into play. Now we have a job, though it doesn’t actually do anything yet, but it’s in such a state that we can test whether it will automatically run once we push some code over to our GIT-repository! Open your TwinCAT library and create a function block-POU that does something. In my case I’ll create a function block FB_Math and implement a method AddTwo which just adds two REALs together and returns the result. Commit & push the library to GIT. I’m using TortoiseGit and I got this result:
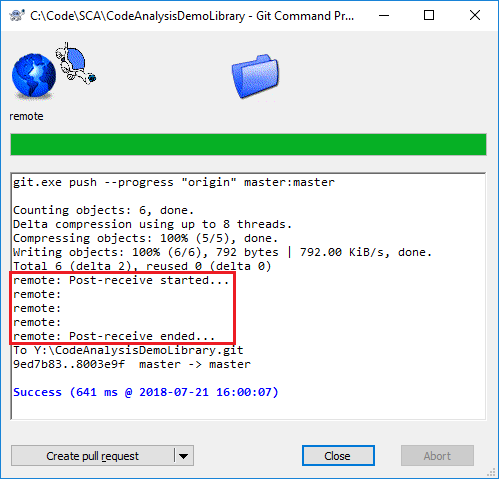
Post-receive hook script started
We can see that our script executed as our echoes have printed! Go to Jenkins and click on your job:
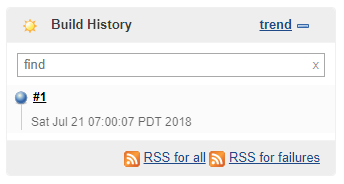
Jenkins builds
Success! I’ve recorded a video that shows how short the time is between the second you push the code to GIT-repository where your hook is launched and the time before Jenkins initiates the build.
Now remember when we configured Jenkins working directory to C:\Jenkins\workspace\<jobname>? Let’s look in that directory on the Jenkins machine:
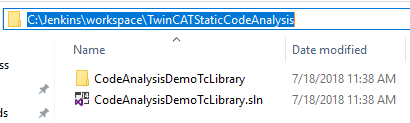
Jenkins workspace output
There is our TwinCAT-project, fantastic! Now we’re all set for the next step. The fun has barely started though, in the next post we’re going to start writing some of the automation code!
Cloud, to-do, browser, usb, like & server icon by Smashicons, programmer & coffee icon by freepik, pc icon by DinosoftLabs, all from www.flaticon.com
Git logo icon by Jason Long from https://git-scm.com/downloads/logos / CC BY 3.0
Jenkins logo icon from https://jenkins.io/artwork / CC BY-SA 3.0