
3S-Smart Software Solutions has since pretty long had a Raspberry Pi (RPI) target image available for their CODESYS runtime. The intention was to create something that you could buy very cheap, primarily for students and such to learn how to program 61131-3.
As I’m primarily working with TwinCAT3, which is based on CODESYS, I’ve been thinking about building a really cheap 61131-3 compatible PLC based on the RPI and the CODESYS target. I didn’t just want it to be one board laying around in my home, but I also wanted it to have the “industrial” feeling, and luckily I found a perfect development board + case for me to initialize the project. Now that it’s finished, I have a PLC running an EtherCAT master in the CODESYS runtime for almost no money at all.
The raspberry PI (RPI) is really awesome in that it gives the possibility to build really small embedded systems with a very small investment.
Now it’s also possible to run a fully 61131-3 compatible programmable logic controller (PLC) as CODESYS have a RPI target runtime. This is also supplied with loads of extras, with built-in support for EtherCAT, Modbus RTU/TCP, Profinet and much more. Your program code can run for 120 minutes before they stop, and for a mere 35€ you can buy a license which allow you to run your programs in their runtime indefinitely in once instance of the RPI.
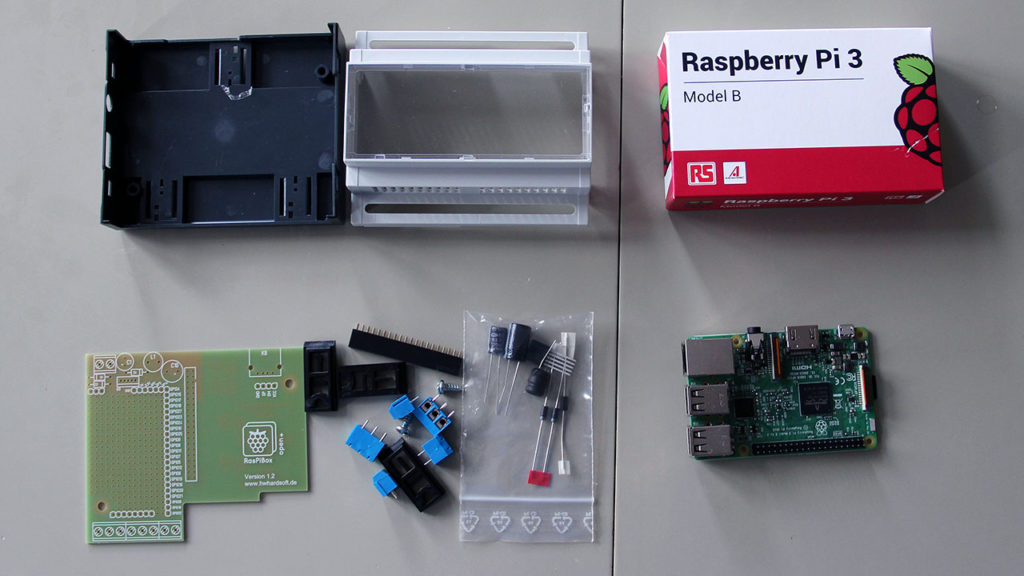
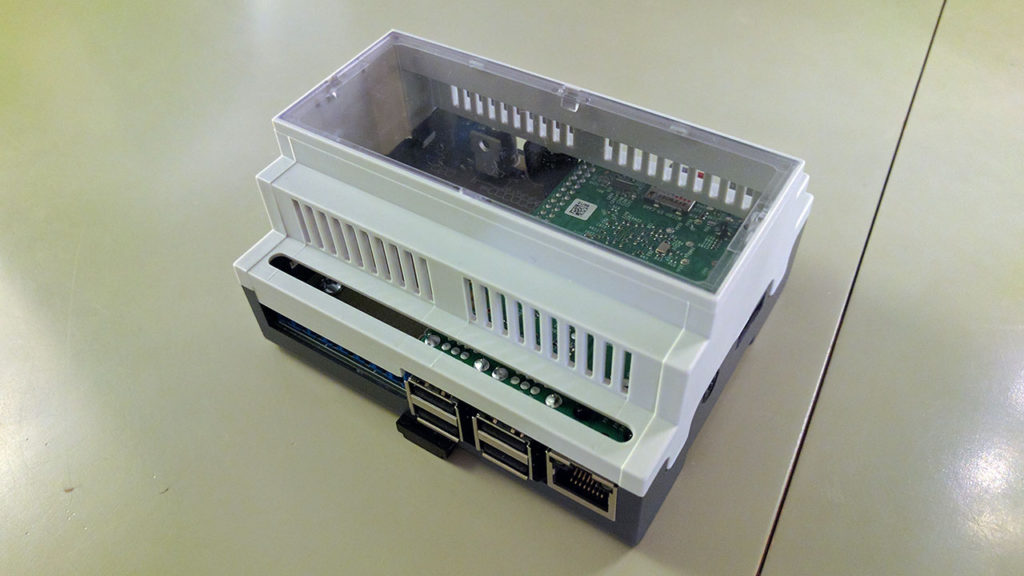
I decided to built a PLC with the RPI, but in a slightly more industrial DIN-mountable casing. I found the RasPiBox open solution which was perfect. It includes not just the enclosure, but also a prototyping board, terminal blocks and a voltage regulator (9-35V DC) which makes the RPI-solution feel even more like a real PLC.
Hardware & Software
The hardware used to build this:
- A raspberry PI 3B
- The RasPiBox standard
- A soldering iron and some solder
- A microSD card
And software used:
- Raspbian Jessie lite – built 2016-09-23, kernel 4.4
- CODESYS V3.5 SP9 Patch 3+
- CODESYS control for raspberry PI – version 3.5.9.20
Built instructions
First I installed Raspbian on the SD-card using the instructions provided by the raspberry pi webpage. The next step was to download and install the CODSYS control for Raspberry PI package after the official instructions. Even though the package is free to try for evaluation (again, 120min limit) you need to register to download it.
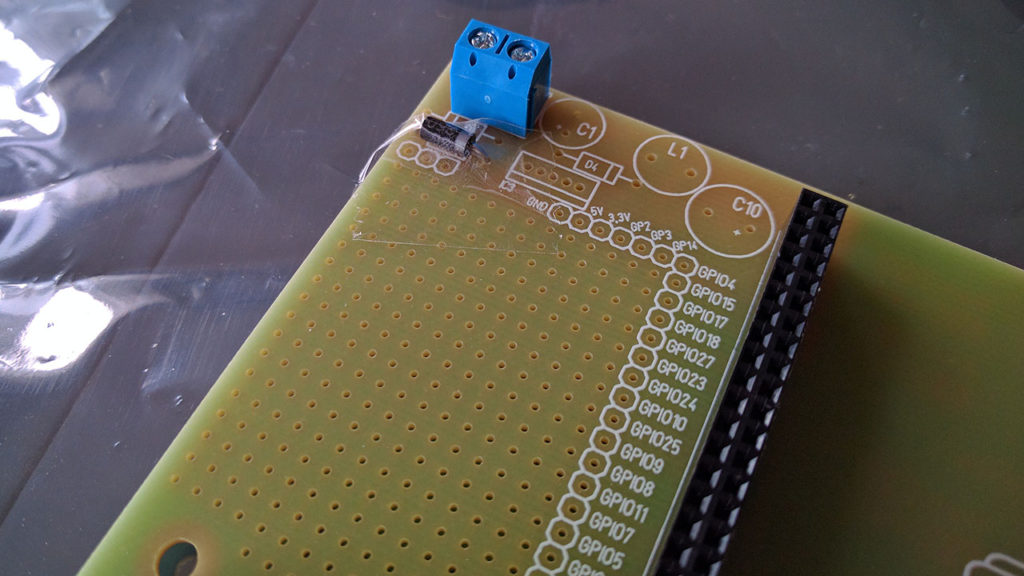
Start by soldering all the parts into place according to the instructions provided with RasPiBox. I usually temporarily add some tape for the parts so they stick firmly at their location before applying the solder. Might not be so beautiful, but it’s temporary and if it works it ain’t stupid…
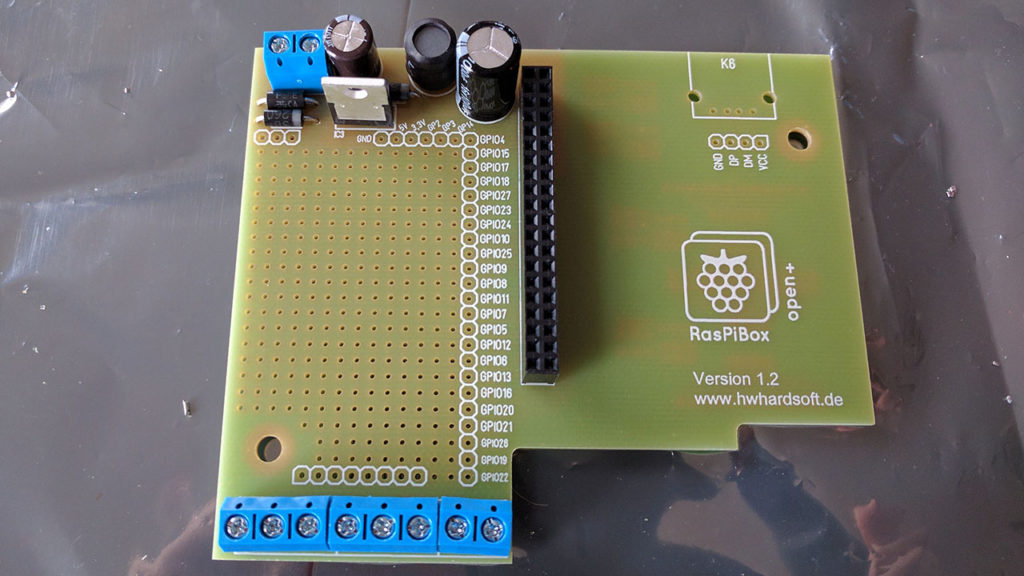
And this is how it looks once everything is soldered into place.
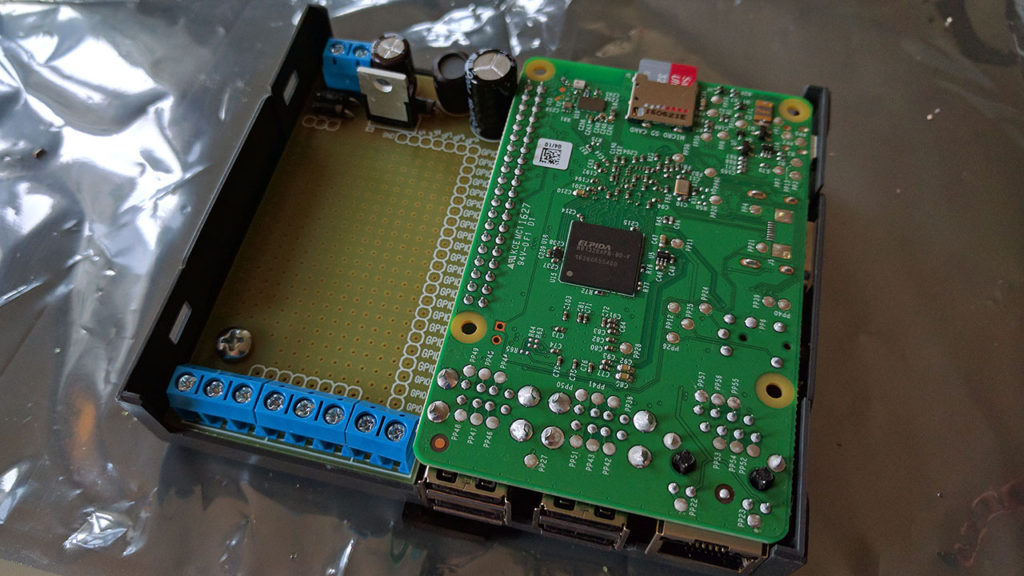
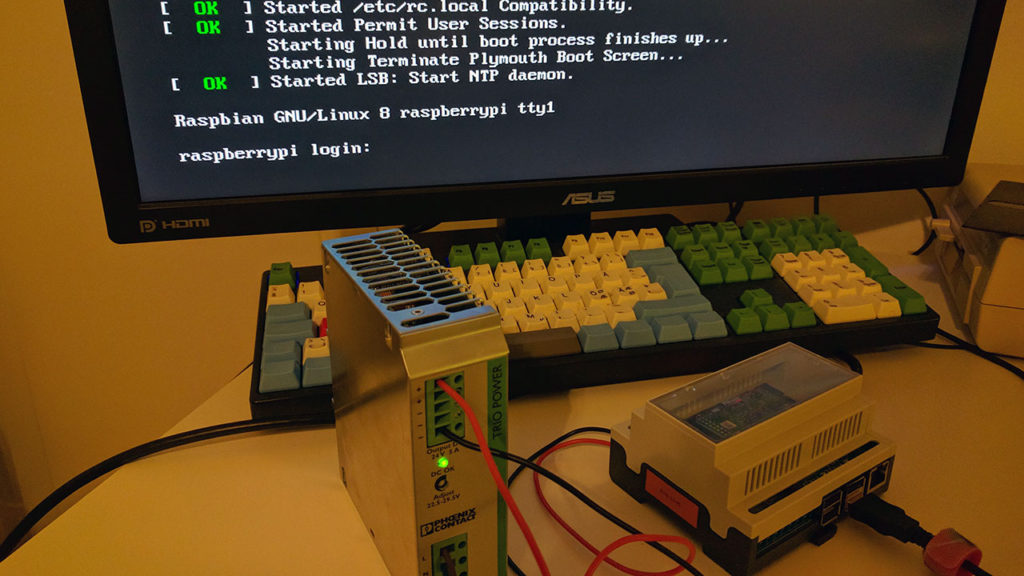
And then just mount the board into the box and attach the Raspberry PI.
The front face attached to the rest of the body, and voila! It actually looks like an industrial PLC now.
Now it was time to test it. As the voltage regulator allows me to connect a power supply between 9-35V DC, a standard UPS of 24V works just fine.
I will try this running as an EtherCAT master and also do some Modbus TCP/RTU communications. The complete cost of this project was:
– Raspberry PI 3 – 38€
– 32gb microSD – 11€
– RasPiBox – 37€
totaling 86€. Top that with a license for CODESYS (35€) and you’ve got a full 61131-3 compatible PLC controller supporting various fieldbuses, I doubt you can get away any cheaper than that!
Hello I will try this, but now the CODESYS Control for Raspberry Pi SL cost 50€. Thanks
Hi & thanks for your comment.
I’d say it’s still very good value for the money considering what you get!
I converted all my plc program of my home light and I realized that everything function well on Raspberry Pi0 W using I/O I2c and using WebVisu. I will buy a license for Raspberry Codesys and e Runtime Key so if in the future the raspberry will burn, I can transfer the license to a new card.
I will use a second Raspberry Pi3B+ as a NAS server in my home and using the software dwserver, I will connect to my domotic PLC WebVisu from a simple web browser around the world.
Your blog has inspired me.
Thanks
Hi Max,
please explain to me what is needed to program more Raspberry PI 3, if one would burn out.
Thanks in advance…
How much space did you need for the installation/setup? Do you think I could make one of these up and get away with using a 16GB SD card?
Hi Dennis!
I was using a 32G SD-card, but I’m sure a 16GB SD-card will do. CODESYS requirements mentions 4GB SD-card, so 16GB will surely suffice.
Did you just use the Codesys – Target and TwinCAT XAE or also Codesys Engineering ?
Hi! I didn’t use TwinCAT. I only used Codesys Engineering.
I am folllowing your tutorial about TwinCAT. It is possible to use RPi4+Codesys+TwinCAT instead TwinCAT on Local target system?
No, it’s not possible to run the XAR on a raspberry pi.
Hi Jakob. Once you have everything setup with CODESYS can you use RPI as ECAT master (with some connected slaves) and be able to still read the RPI IOs at the same time (with the same time stamp)?. I have some ECAT slaves and some other sensors that I would like to read (that could be connected to the RPI GPIOs) and thought this might be a good option, but I don’t have experience with CODESYS (just TWINCAT).
Hi Jakob, thanks for this guide, this is an amazing solution! Especially when there are shortages in Beckhoff PLCs and all their other components. Would you recommend using it for any actual machine? I have used Pi and Arduino before for an actual machine (and they ran very well). However, I used Node-RED before, and not TwinCAT.
How reliable do you think this device can be?
Thanks so much for all of your work!